Before you begin:
| Step | Action |
|---|---|
| 1 |
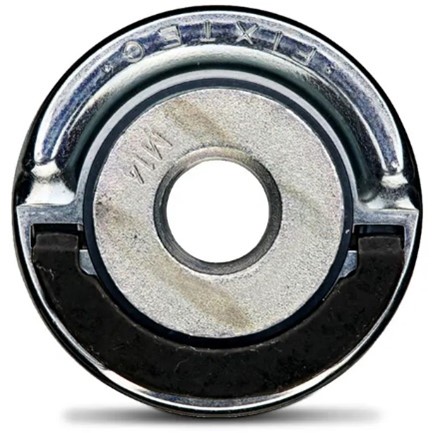
These instructions apply to RYOBI Angle Grinders with a tool free locking nut (FIXTEC):
The locking nut will have a small tab to one side of the centre thread that can flip up, to help lever the locking nut on or off. If your Angle Grinder has a pin spanner locking nut, see: How to remove RYOBI Angle Grinder disc using a pin spanner |
| 2 | Make sure that the disc you are trying to fit is the correct size for the grinder - see: What size disc is compatible with a RYOBI Angle Grinder? |
| 3 | Make sure the Angle Grinder and disc you've selected is suitable for your work. Not all Angle Grinders are equipped for cutting or grinding, so check that the grinder you have is up to the task by locating your product on ryobi.com.au and referring to the product description. |
| 4 | Gloves are recommended when holding or gripping the disc. |
| Note | Always disconnect power (battery or corded) when fitting or removing a disc. |
To fit the disc using a tool free locking nut:
| Step | Action |
|---|---|
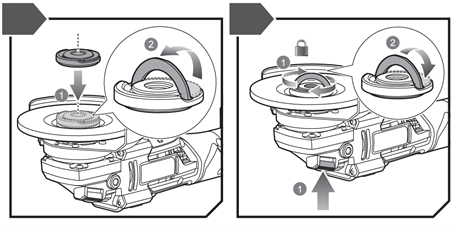
| 1 | Disconnect the power (remove battery or unplug power). |
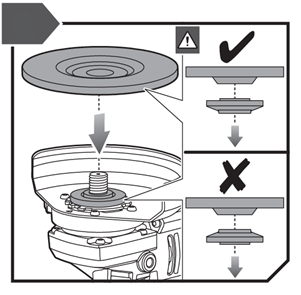
| 2 |
Place the disc so it sits flush within the inner flange and place the tool-free locking nut on the spindle/thread.
|
| 3 | Depress the spindle lock button (on the other side of the grinder, usually the top,) to lock the spindle/thread from moving freely. |
| 4 | Then flip up the black lever on the locking nut and tighten by hand CLOCKWISE until the nut is tight. |
| 5 |
Flip down the black lever on the locking nut to sit flush with the locking nut.
|
To remove the disc using a tool free locking nut:
| Step | Action |
|---|---|
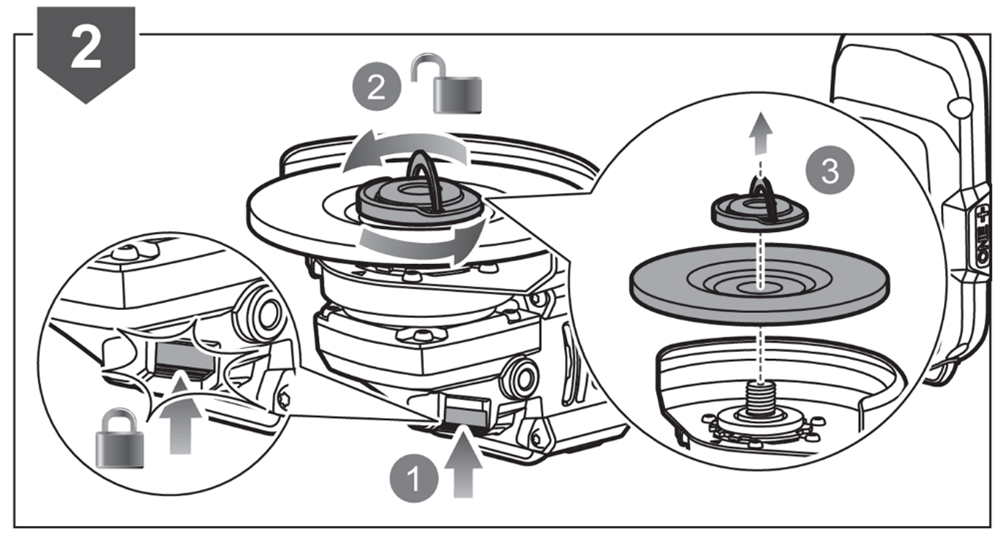
| 1 | Disconnect the grinder from power (remove battery or unplug power chord), and turn the grinder so the locking nut and disc are accessible. |
| 2 | Then flip up the black lever on the locking nut and depress the spindle lock button until the disc and lock nut stop moving freely. The button is located on the other side of the grinder, usually the top. |
| 3 |
Keeping the spindle lock button depressed, flip up the black lever on the locking nut, unscrew the locking nut in an ANTI-CLOCKWISE direction, then remove the locking nut to access the disc.
|
R18AG7-0, RAG18X, R18AG1, R18AG15