SEARCH
Enter keywords, product name, or question
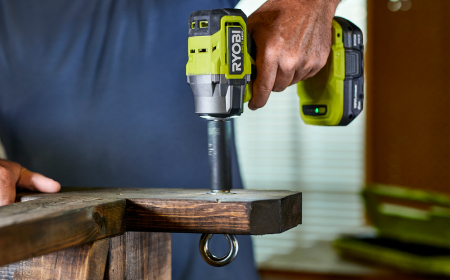
1. Check the chuck securing screw
- If the chuck feels loose or unstable, the securing screw may have loosened—this can happen when bits are dropped deep into the chuck.
- Use a matching bit (typically PH3 or Torx T30) to tighten the screw anti-clockwise.
2. Proper bit seating
- Ensure the drill bit is seated evenly in the chuck jaws with equal pressure applied.
- Some chucks feature a ratcheting mechanism to prevent over-tightening, but always check that the bit is securely held.
- After tightening, pull the bit gently to confirm it’s properly secured and not slipping.
3. Inspect drill bits
- Worn or damaged bits can reduce the chuck’s holding power.
- Always use bits that are in good condition and appropriate for the material being drilled.
4. Clean the chuck
- Debris in the chuck jaws can make adjustment difficult or cause stiffness.
- Fully open the chuck and clean out any dust or dirt using:
- Compressed air (from a can or air compressor)
- A small cylindrical brush or pipe cleaner
- Cycle the chuck open and closed several times to help dislodge any remaining debris.
5. Check chuck capacity
- Refer to the instruction manual or the engraving on the chuck to confirm its rated capacity.
- If your drill bits exceed the chuck’s capacity, consider using a more suitable tool such as a drill press or rotary tool.
Warranty support
If the issue persists and your tool is still within the warranty period, return it to Bunnings with your receipt or proof of purchase for a warranty assessment.
R18DD12, RDD18C, R18DD3-H25F, R18DD3-0, R18DDP2-H20G, R18DDBL-55S, R18PD2422B, R18CPD14, R18XPD142B, RPD18C, RPD18X, R18XPD14, R18PD3-H40G, R18PD3-H155S, R18PDBL-C55S, R18PD3-0, R18PD7-C15S, R18PD7-0