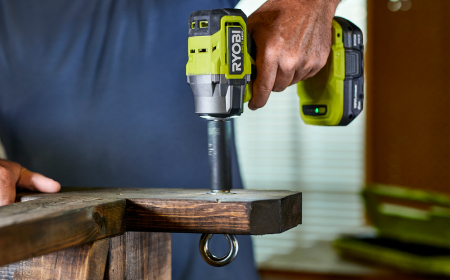
Understanding drill driver settings
Drill driver settings are designed to help you drill holes and drive screws effectively into different materials. Here's how to use them:
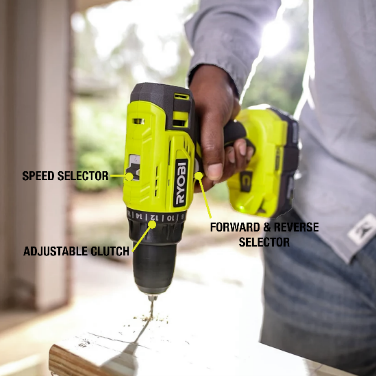
Speed settings
Most Ryobi drill drivers feature a two-speed selector on top of the tool:
- Speed 1 (low speed)
- Ideal for larger diameter holes
- Provides greater torque and better control
- Recommended for control or when working with tough materials
- Speed 2 (high speed)
- Best for smaller holes (less than 13 mm)
- Offers faster drilling performance
Forward & reverse selector
All Ryobi drill drivers include a direction switch:
- Forward: for drilling into materials and driving screws in
- Reverse: for removing screws or backing out drill bits
Adjustable torque clutch
Most models include a torque clutch to control screw depth and prevent overdriving:
- Settings range: typically from 1 to 24, plus a drill bit icon and sometimes a hammer icon (on hammer drills)
- Drill mode:
- Use the drill bit icon for drilling into wood, metal, or plastic
- Use the hammer icon for drilling into brick or masonry
Using the clutch for driving screws
- Start with a lower torque setting and drive a screw
- If the clutch disengages due to resistance, increase the setting gradually
- Find the optimal setting that drives the screw to the desired depth without overdriving or disengaging
Practice makes perfect
If you're unfamiliar with the material or settings, test on a scrap piece first to get a feel for the correct configuration.
R18PD7-0, R18DDBL-0, R18PDBL-0, R18PD3-H155S, R18CPD14, R18DD12, R18PD3-H40G, R18ID14, R18DDHE12, R18PD2422B, RDD18C, RPD18C, RPD18X, R18DDP2-H20G, R18DD3-0, R18CK2-H4P, R18XPD14, R18XPD142B